 Save
Save A few years ago, I was standing in my kitchen on a Tuesday morning, staring at a box of oats and thinking about all those expensive granola bars I kept buying. The thought hit me suddenly: why not make something just as convenient, but better? I grabbed some maple syrup from the back of the pantry, dust and all, and started experimenting. The result was these maple cinnamon oatmeal bars, and they've been my go-to ever since.
I remember bringing a batch to my neighbor's place on a Saturday afternoon, warm from the oven and still smelling like cinnamon. She took one bite and asked if I could make them every week. That's when I realized these bars had crossed from personal breakfast hack into something I actually wanted to share.
Ingredients
- Old-fashioned rolled oats (2 cups): Use the thick-cut kind, not instant—they hold their texture and give you those satisfying chews.
- Whole wheat flour (1 cup): This adds earthiness and keeps the bars from feeling too cake-like.
- Pure maple syrup (1/2 cup): This is the soul of the recipe, so don't reach for the pancake syrup imposters.
- Unsalted butter, melted (1/4 cup): Or use coconut oil for a dairy-free version; I've made them both ways and honestly prefer the coconut.
- Unsweetened applesauce (1/4 cup): This keeps them moist without adding extra sugar.
- Ground cinnamon (1 tsp): Measure generously here—cinnamon is what makes these smell like coming home.
- Egg (1 large): Binds everything together and keeps the crumb tender.
- Baking powder (1/2 tsp): Just enough lift so they're not dense.
- Vanilla extract (1 tsp): Choose real vanilla if you can—it deepens the whole flavor.
- Salt (1/4 tsp): A pinch that you won't taste but will definitely notice if it's missing.
- Chopped nuts or dried fruit (optional): Walnuts add crunch, raisins add sweetness; I often throw in both.
Tired of Takeout? 🥡
Get 10 meals you can make faster than delivery arrives. Seriously.
One email. No spam. Unsubscribe anytime.
Instructions
- Prep your pan:
- Heat your oven to 350°F. Line an 8x8-inch pan with parchment paper, letting the edges hang over so you can lift the whole batch out later—this one small step makes cutting so much easier.
- Mix the dry base:
- In a large bowl, combine oats, whole wheat flour, cinnamon, baking powder, and salt. The mixture should smell warm and inviting already.
- Whisk the wet ingredients:
- In another bowl, whisk maple syrup, melted butter, applesauce, egg, and vanilla until it's smooth and glossy. Take a second to appreciate how good this smells.
- Bring them together:
- Pour the wet mixture into the dry and stir until just combined—don't overmix or you'll end up with tough bars instead of tender ones. This is the moment where you can fold in your nuts and dried fruit if you're using them.
- Spread and smooth:
- Transfer the batter to your prepared pan and use a spatula to press it into an even layer. The batter will be thick, almost like cookie dough.
- Bake:
- Pop it into the oven for 22 to 25 minutes—you're looking for golden edges and a toothpick that comes out clean from the center. The kitchen will smell incredible.
- Cool and cut:
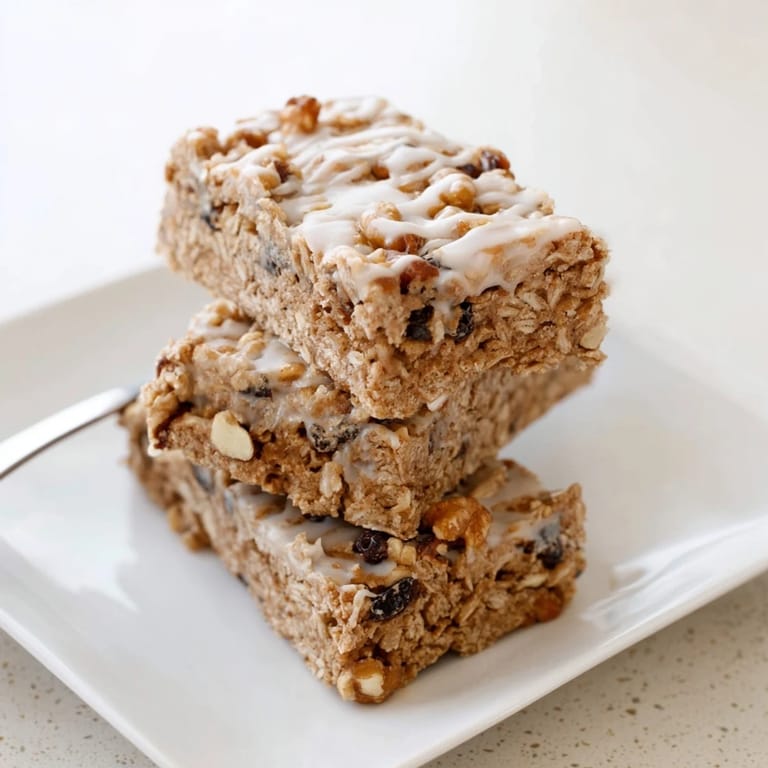
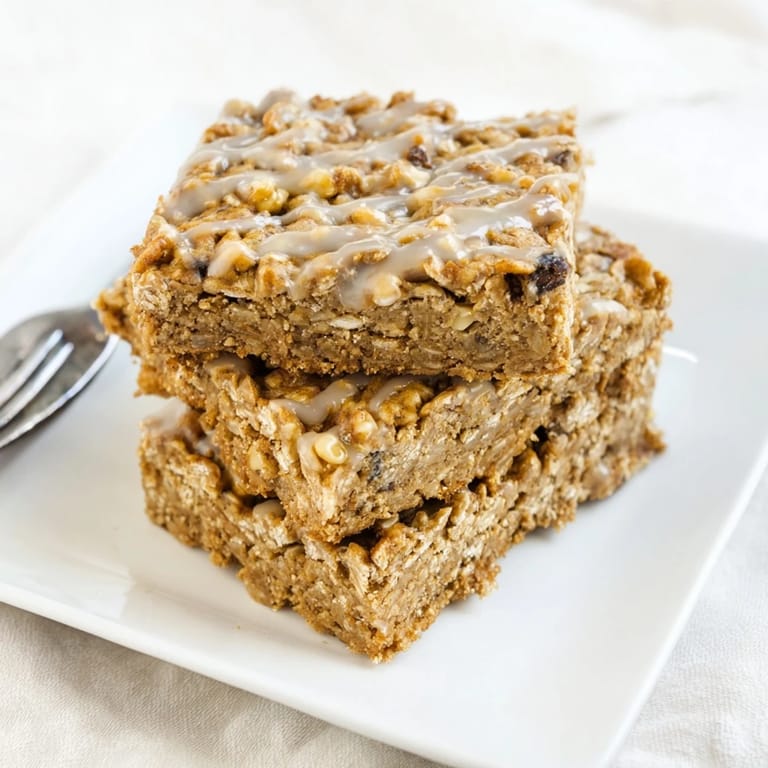
- Let the pan cool completely on a wire rack, then use those parchment paper handles to lift the whole thing out. Cut into 12 bars with a sharp knife, wiping the blade between cuts for clean edges.
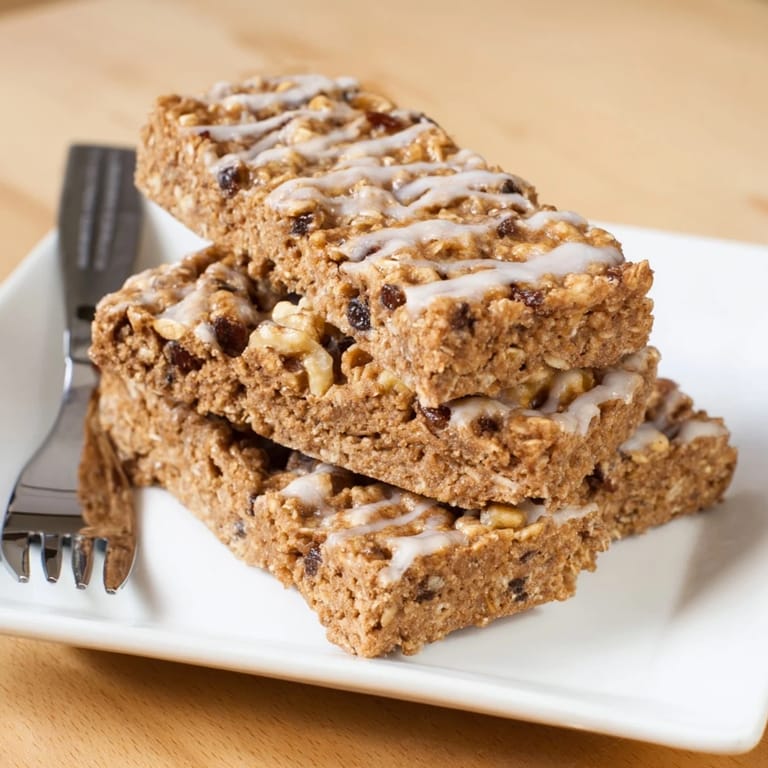 Save
Save There's something about a homemade breakfast bar that changes the morning. You're not rushing through a store-bought wrapper; you're biting into something you made, something that tastes like cinnamon and intention.
Why These Bars Win on Busy Mornings
The real magic is that these sit on the counter for the whole week, no refrigeration needed, ready to grab with coffee or slip into a lunchbox. I've learned that having something wholesome already made is the difference between a rushed breakfast and actually sitting down for five minutes. They're sturdy enough to travel, soft enough to enjoy, and interesting enough that you don't get bored eating the same thing five days in a row.
Make Them Your Own
Once you nail the basic recipe, you start seeing possibilities everywhere. I've swapped in dates instead of raisins, added pumpkin spice when fall hits, even mixed in some shredded coconut just because. The foundation is so solid that variations feel like playing rather than experimenting.
Storage and Keeping
These bars are built to last, which is part of their beauty. I keep mine in a glass container on the counter for easy grabbing, and they stay fresh and chewy for nearly a week. If you want to get ahead, they freeze beautifully for up to a month—just thaw one the night before or pop it in the microwave for 15 seconds in the morning.
- For vegan bars, use a flax egg (1 tbsp ground flaxseed mixed with 3 tbsp water) instead of the egg.
- Coconut oil works just as well as butter and makes them completely dairy-free.
- Pair with Greek yogurt and fresh berries to turn a bar into a proper breakfast plate.
 Save
Save These bars have become my answer to that question everyone asks on a Monday: what can I eat that's actually good for me? They prove that convenience and wholesome ingredients don't have to be at odds.
Recipe FAQ
- → Can I make these bars vegan?
Yes, replace the egg with a flax egg made from ground flaxseed and water to keep the bars vegan without sacrificing texture.
- → How can I store the bars to keep them fresh?
Store the bars in an airtight container at room temperature for up to 5 days, or freeze them for longer shelf life.
- → Are there any nut-free options?
Simply omit nuts from the mixture to accommodate nut-free diets without altering the overall flavor significantly.
- → What baking pan size should I use?
An 8x8-inch (20x20 cm) baking pan lined with parchment paper is ideal for even baking and easy removal.
- → Can I add other mix-ins to these bars?
Yes, chocolate chips or seeds can be added for extra variety and taste without altering the main flavors.