 Save
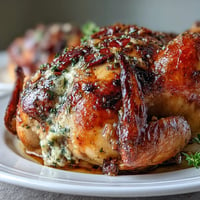
Save My neighbor handed me a casserole dish through the fence one Thursday evening, still warm, with chicken that smelled like butter and cheese and something I couldn't quite name. She said it was just garlic and Parmesan, nothing fancy, but I stood there in my yard eating straight from the dish with a fork I grabbed from the kitchen. That crispy, golden crust stuck in my mind for weeks until I finally tried making it myself. It turned out even better than I remembered, and now it's the recipe I turn to when I need dinner to feel like a small victory.
I made this for my brother the night he came over to help me move furniture, and he ate three pieces standing up in the kitchen before we even sat down. He kept saying it reminded him of the chicken parm our mom used to make, but simpler, less messy, and somehow more satisfying. We ended up abandoning the furniture project and just sitting at the table talking until the pan was empty. I've made it for him a dozen times since, and he still asks for it every time he visits.
Ingredients
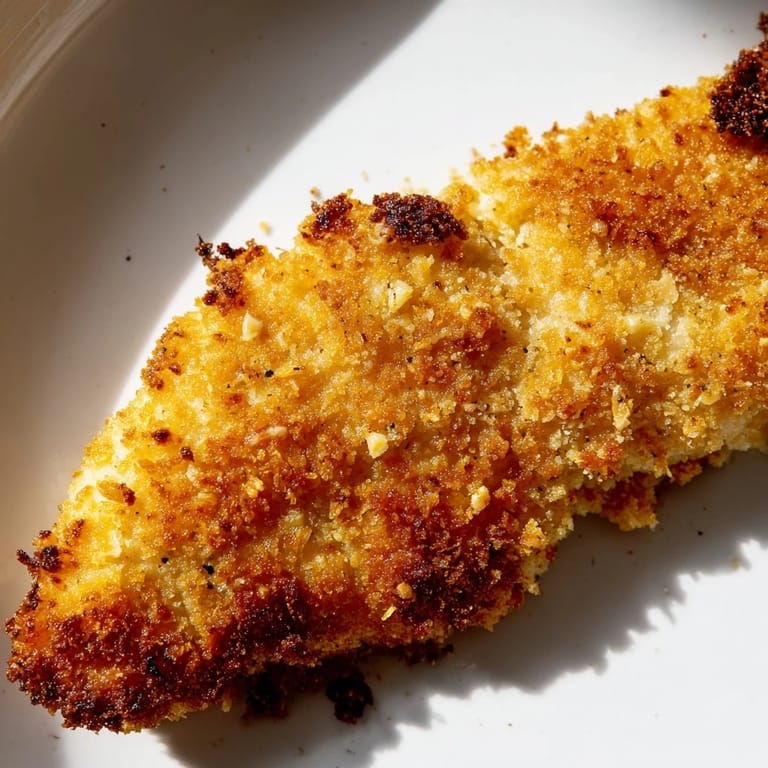
- Boneless, skinless chicken breasts: Pat them really dry before you season them, or the coating won't stick as well and you'll lose that perfect crust.
- Unsalted butter: Melted butter carries the garlic flavor into every bite and helps the breadcrumb mixture cling like glue.
- Garlic: Fresh minced garlic makes all the difference here, the jarred stuff just doesn't have the same punch or fragrance.
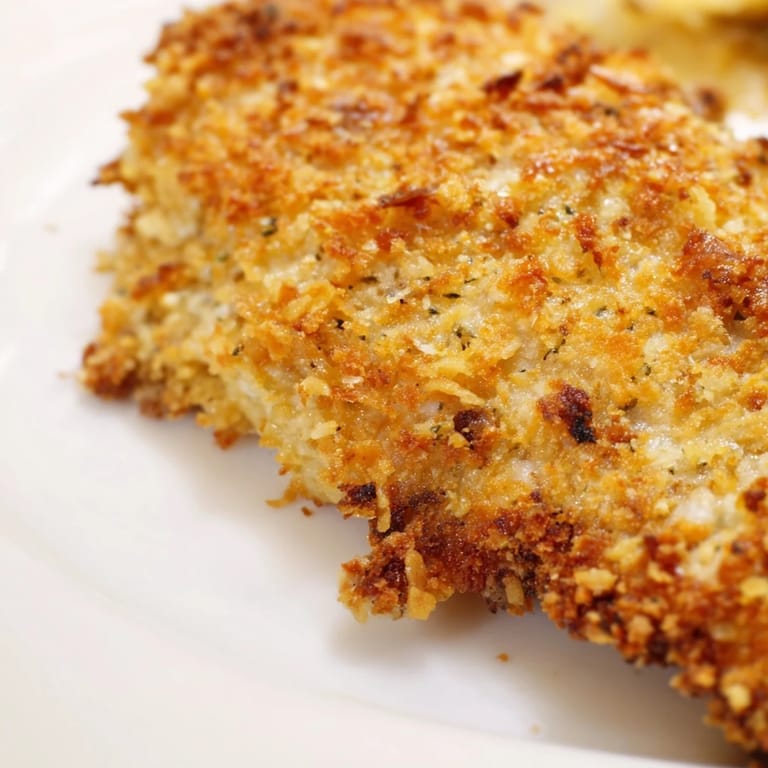
- Parmesan cheese: Use the real stuff, freshly grated if you can, because the pre-shredded kind doesn't melt or brown the same way.
- Fine breadcrumbs: They create a delicate, even crust that gets golden and crispy without feeling heavy.
- Dried Italian herbs: A simple blend of oregano, basil, and thyme adds warmth and depth without overpowering the garlic and cheese.
- Paprika: Just a touch gives the crust a little color and a hint of sweetness that balances the savory notes.
- Fresh parsley: A sprinkle at the end brightens everything up and makes the dish look like you put in way more effort than you did.
Tired of Takeout? 🥡
Get 10 meals you can make faster than delivery arrives. Seriously.
One email. No spam. Unsubscribe anytime.
Instructions
- Preheat and prep:
- Get your oven up to 200°C and line a baking sheet with parchment so nothing sticks. This is also the moment to clear your counter and get your bowls ready, it makes the whole process feel calmer.
- Season the chicken:
- Dry those chicken breasts completely with paper towels, then season both sides with salt and pepper. Don't be shy with the seasoning, it's the foundation of flavor before the coating even goes on.
- Mix the garlic butter:
- Melt your butter in a small bowl and stir in the minced garlic until it smells like the best part of any kitchen. This mixture is what makes the chicken taste rich and deeply savory.
- Prepare the coating:
- In a shallow dish, combine Parmesan, breadcrumbs, Italian herbs, and paprika, mixing until everything is evenly distributed. The smell alone will make you want to start snacking on it straight from the bowl.
- Coat the chicken:
- Dip each chicken breast into the garlic butter, letting the excess drip off, then press it into the breadcrumb mixture on both sides. Make sure the coating sticks firmly, pressing gently with your fingers to help it adhere.
- Arrange and drizzle:
- Place the coated chicken on your prepared baking sheet, leaving a little space between each piece. Drizzle any leftover garlic butter over the tops, it adds extra flavor and helps the crust brown beautifully.
- Bake to golden perfection:
- Slide the pan into the oven and bake for 25 to 30 minutes, until the chicken is golden and crispy and registers 74°C inside. The kitchen will smell so good that people will start wandering in asking when dinner is ready.
- Rest and serve:
- Let the chicken rest for five minutes before serving, it keeps the juices inside instead of running all over your cutting board. Garnish with fresh parsley if you have it, then serve hot and watch it disappear.
 Save
Save One night I served this with roasted broccoli and mashed potatoes, and my friend who claims she doesn't like chicken asked for the recipe before she even finished her plate. She told me later that she made it for her family and her kids actually ate it without complaining, which she said was a miracle. That's when I realized this dish has a kind of magic to it, the way it turns skeptics into believers and makes ordinary dinners feel special without any fuss.
How to Get the Crispiest Crust
The secret to a truly crispy crust is making sure your chicken is bone dry before you start and not overcrowding the pan. If the chicken breasts are too close together, they'll steam instead of roast, and you'll lose that golden crunch. For extra crispiness, switch your oven to broil for the last two or three minutes, but stay close and watch carefully because the line between perfectly browned and burnt happens fast. I learned this the hard way after walking away to answer a phone call and coming back to a smoking pan.
What to Serve Alongside
This chicken pairs beautifully with just about anything green and crisp, like a simple arugula salad with lemon vinaigrette or roasted green beans with garlic. If you want something more filling, creamy mashed potatoes or buttery rice pilaf soak up any extra garlic butter on the plate. I've also served it with roasted sweet potatoes and it was perfect, the sweetness balanced out the savory crust in a way I didn't expect. Keep the sides simple and let the chicken be the star.
Storage and Reheating Tips
Leftovers keep well in an airtight container in the fridge for up to three days, though the crust won't stay as crispy once it's been stored. To reheat, I put the chicken on a baking sheet in a 180°C oven for about ten minutes, which brings back some of that crunch way better than the microwave ever could. You can also slice the cold chicken and toss it into a salad or sandwich, it's surprisingly good that way too.
- Let the chicken cool completely before storing it or condensation will make the coating soggy.
- If you're meal prepping, bake the chicken fresh rather than reheating it multiple times for the best texture.
- Freeze cooked chicken for up to two months, then thaw in the fridge overnight and reheat in the oven until warmed through.
 Save
Save This recipe has become my go to whenever I need something reliable, comforting, and just a little bit impressive without the stress. It's the kind of dish that makes you feel like you've got dinner figured out, even on the nights when everything else feels a little chaotic.
Recipe FAQ
- → How do I keep the chicken moist while baking?
Pat the chicken dry before coating and avoid overbaking. The internal temperature should reach 74°C (165°F). Let it rest for 5 minutes after baking to retain juices.
- → Can I prepare this ahead of time?
Yes. Coat the chicken and refrigerate for up to 4 hours before baking. Add a few extra minutes to the cooking time if baking from cold.
- → What can I substitute for breadcrumbs?
Use crushed panko, almond flour, or crushed crackers. For gluten-free, certified GF breadcrumbs work perfectly and maintain the same crispy texture.
- → How do I get extra crispy coating?
Broil the chicken for the last 2–3 minutes under close supervision. Alternatively, press the breadcrumb mixture firmly onto the buttered chicken for better adhesion.
- → What side dishes pair well with this?
Fresh green salads, roasted seasonal vegetables, creamy mashed potatoes, or garlic rice all complement the savory garlic and Parmesan flavors beautifully.
- → Can I use chicken thighs instead of breasts?
Absolutely. Thighs remain juicier and may need 5–10 additional minutes to reach the proper internal temperature of 74°C (165°F).