 Save
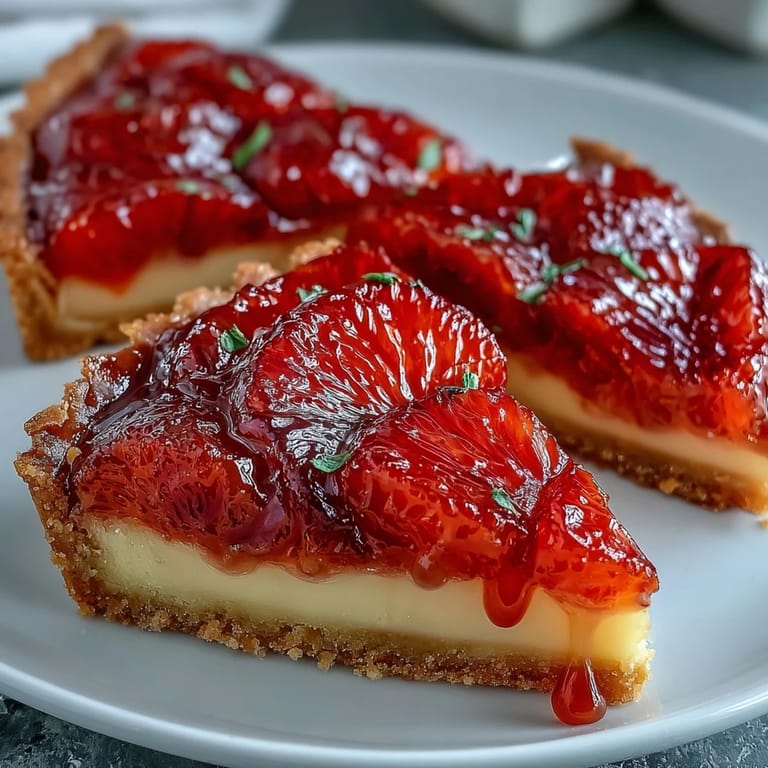
Save The pastry case shattered under my fork with that perfect snap, and I knew I'd finally gotten it right. Blood oranges were piled in a bowl on my counter, their deep magenta flesh glowing against the winter light filtering through the kitchen window. I'd been intimidated by tarts for years, convinced they required some secret pastry school knowledge I didn't have. Turns out, cold butter and a little patience were all I really needed.
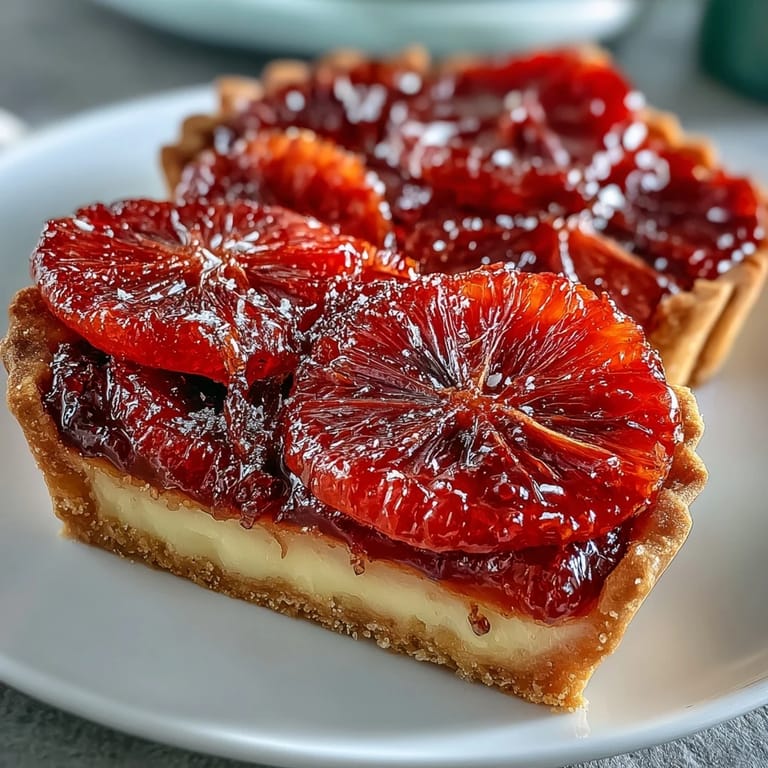
I made these for a dinner party where I'd promised something impressive, then panicked halfway through the week. The tarts sat in the fridge, shells and custard waiting patiently, while I handled everything else. Twenty minutes before guests arrived, I assembled them at the counter, laying those blood orange rounds in overlapping circles. My friend walked in early, saw them on the cooling rack, and asked which bakery I'd used.
Ingredients
- All-purpose flour: The base of your tart shell, and using cold ingredients around it is what gives you that flaky, crisp texture instead of a tough one.
- Powdered sugar: Dissolves more smoothly into the dough than granulated and adds a subtle sweetness that won't overpower the citrus.
- Unsalted butter, cold and cubed: Keep it truly cold, the colder the better, because those little butter bits create steam pockets when baking and that means flakiness.
- Egg yolk: Adds richness and helps bind the dough without making it tough like a whole egg might.
- Ice water: Brings the dough together without warming it up, use just enough so it holds and no more.
- Whole milk: The custard foundation, and whole milk gives you the creaminess you want without needing cream.
- Granulated sugar: Sweetens the custard just enough to balance the tart citrus without turning it into candy.
- Egg yolks: These thicken the custard and give it that luscious, golden color.
- Cornstarch: A little insurance against curdling, it stabilizes the custard so you can whisk with confidence.
- Pure vanilla extract: A warm, round note that makes the custard feel complete.
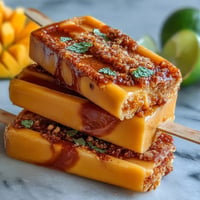
- Blood oranges: The star, with their deep color and sweet-tart flavor that tastes like regular oranges got interesting.
- Honey: Optional but worth it, a thin glaze makes the fruit glisten and adds a whisper of floral sweetness.
Tired of Takeout? 🥡
Get 10 meals you can make faster than delivery arrives. Seriously.
One email. No spam. Unsubscribe anytime.
Instructions
- Make the tart dough:
- Pulse your flour, powdered sugar, and salt in the food processor, then add those cold butter cubes and pulse until it looks like wet sand. Add the egg yolk and a tablespoon of ice water, pulsing until the dough just starts to clump, add a bit more water if it's still dry and crumbly.
- Chill the dough:
- Pat it into a disk, wrap it tightly in plastic, and let it rest in the fridge for at least an hour. This firms up the butter and relaxes the gluten, which means easier rolling and a tender crust.
- Roll and shape:
- On a floured surface, roll the dough to about 1/8-inch thick, turning it often so it doesn't stick. Cut circles big enough to fit your tart pans, press them in gently, and trim the edges, then chill the shaped shells for 20 minutes so they hold their shape in the oven.
- Blind bake:
- Line each shell with parchment, fill with pie weights or dried beans, and bake at 350°F for 15 minutes. Remove the weights and parchment, then bake another 5 minutes until golden and crisp, let them cool completely before filling.
- Cook the custard:
- Heat the milk until it's steaming but not boiling, then whisk together your egg yolks, sugar, and cornstarch in a bowl until smooth and pale. Slowly pour the hot milk into the yolk mixture while whisking, then return everything to the saucepan and cook over medium heat, whisking constantly, until it thickens and bubbles for 2 to 3 minutes.
- Finish the custard:
- Off the heat, stir in the vanilla and butter until melted and smooth. Press plastic wrap directly onto the surface to prevent a skin, cool to room temperature, then chill for at least an hour until it's firm and scoopable.
- Assemble the tarts:
- Spoon the chilled custard into your cooled tart shells, smoothing the tops gently. Arrange the blood orange slices in overlapping circles on top, covering the custard completely for that wow moment.
- Glaze and serve:
- If you want that bakery shine, warm a tablespoon of honey with a teaspoon of water and brush it lightly over the oranges. Chill the finished tarts until you're ready to serve, they'll hold beautifully for several hours.
 Save
Save I served these at a winter birthday dinner, and my sister-in-law, who usually skips dessert, ate hers slowly with her eyes closed. She said it tasted like sunshine in the middle of February. I'd never thought about it that way, but she was right, the blood oranges were bright and alive against all that buttery, vanilla sweetness.
Choosing Your Blood Oranges
Blood oranges show up in markets from December through March, and their color can range from streaky pink to deep crimson. I've learned to pick ones that feel heavy for their size, that weight means juice. The skin color doesn't always match the inside, sometimes a pale orange hides the most dramatic flesh. If you can, buy an extra one or two, because you'll want to taste them as you go and maybe sneak a few segments for yourself before they make it onto the tarts.
Making Them Ahead
The beauty of these tarts is how they break into stages. I bake the shells up to two days ahead and keep them in an airtight container at room temperature. The custard sits in the fridge, covered, for up to a day before assembly. The only thing I don't do early is add the fruit, because the oranges can weep a little and soften the custard underneath. Thirty minutes before serving, I assemble everything and they look like I've been fussing all day.
Serving and Pairing
These tarts are rich enough to feel indulgent but not so heavy that you regret them after dinner. I've served them with a glass of sparkling rosé, and the bubbles cut through the custard in the best way. A dessert wine works too, something with a little citrus note that echoes the blood orange. If you're feeling minimalist, they're stunning on their own with nothing but a fork and good company.
- Let the tarts sit at room temperature for 10 minutes before serving so the custard softens just slightly.
- A tiny pinch of flaky sea salt on top right before serving adds an unexpected edge.
- Leftover custard is excellent on its own, eaten with a spoon straight from the bowl.
 Save
Save There's something about a tart that feels like a small celebration, even on an ordinary Wednesday. These blood orange tarts have become my answer to winter's grey days, a little bright spot that reminds me why I love baking in the first place.
Recipe FAQ
- → Can I make these tarts ahead of time?
Yes, you can prepare the tart shells and custard a day in advance. Store them separately in the refrigerator and assemble with fresh blood orange slices just before serving for the best texture and presentation.
- → What can I substitute for blood oranges?
Regular navel oranges, Cara Cara oranges, or even mandarins work well as substitutes. While you'll lose the distinctive ruby color, the flavor will still be delicious and citrusy.
- → How do I prevent the tart shells from shrinking?
Chilling the dough before and after rolling is essential. The 20-minute chill after fitting the dough into pans helps relax the gluten and set the butter, minimizing shrinkage during baking.
- → Can I use store-bought tart shells?
Absolutely. Pre-made tart shells save significant time and still produce an impressive dessert. Just fill with homemade custard and top with blood orange slices for a semi-homemade option.
- → How should I store leftover tarts?
Cover assembled tarts loosely with plastic wrap and refrigerate for up to 2 days. The shells may soften slightly over time, so they're best enjoyed within 24 hours of assembly.
- → What's the best way to slice blood oranges neatly?
Use a sharp serrated knife to cut off both ends, then carefully slice away the peel and pith following the curve of the fruit. Slice into thin rounds, removing any seeds as you go.